Life is interesting. Last year I bought a Fuji Digital camera that I almost exclusively shoot in black and white.
Thirty years ago I used to love shooting Fujicolor, enriching my visual life much more than Paul Simon’s Kodachrome.
This year Anita de Villiers introduced me to a simple way of blending on Photoshop that gives me my Fujicolor effect again.
It all started with the information that the human eye can see 16 f-stops of light while the humble digital sensor can only see 5 f-stops. This is quite fundamental to digital photography, and why some great photographers still shoot transparencies that are scanned into Photoshop for gorgeous processing. Nick Brandt, for example.
This f-stop limit of the digital sensor is as important as why you should shoot in RAW. The good thing is if you have followed nothing of my paper so far, you can still do all of this with bracketed JPEG pictures.
Fujicolor slide film had an amazing range of light and dark capture. My latest and greatest digital sensor (the camera of which is now in for repairs / replacement after a drowning incident in the ocean) can only do that with bracketing.
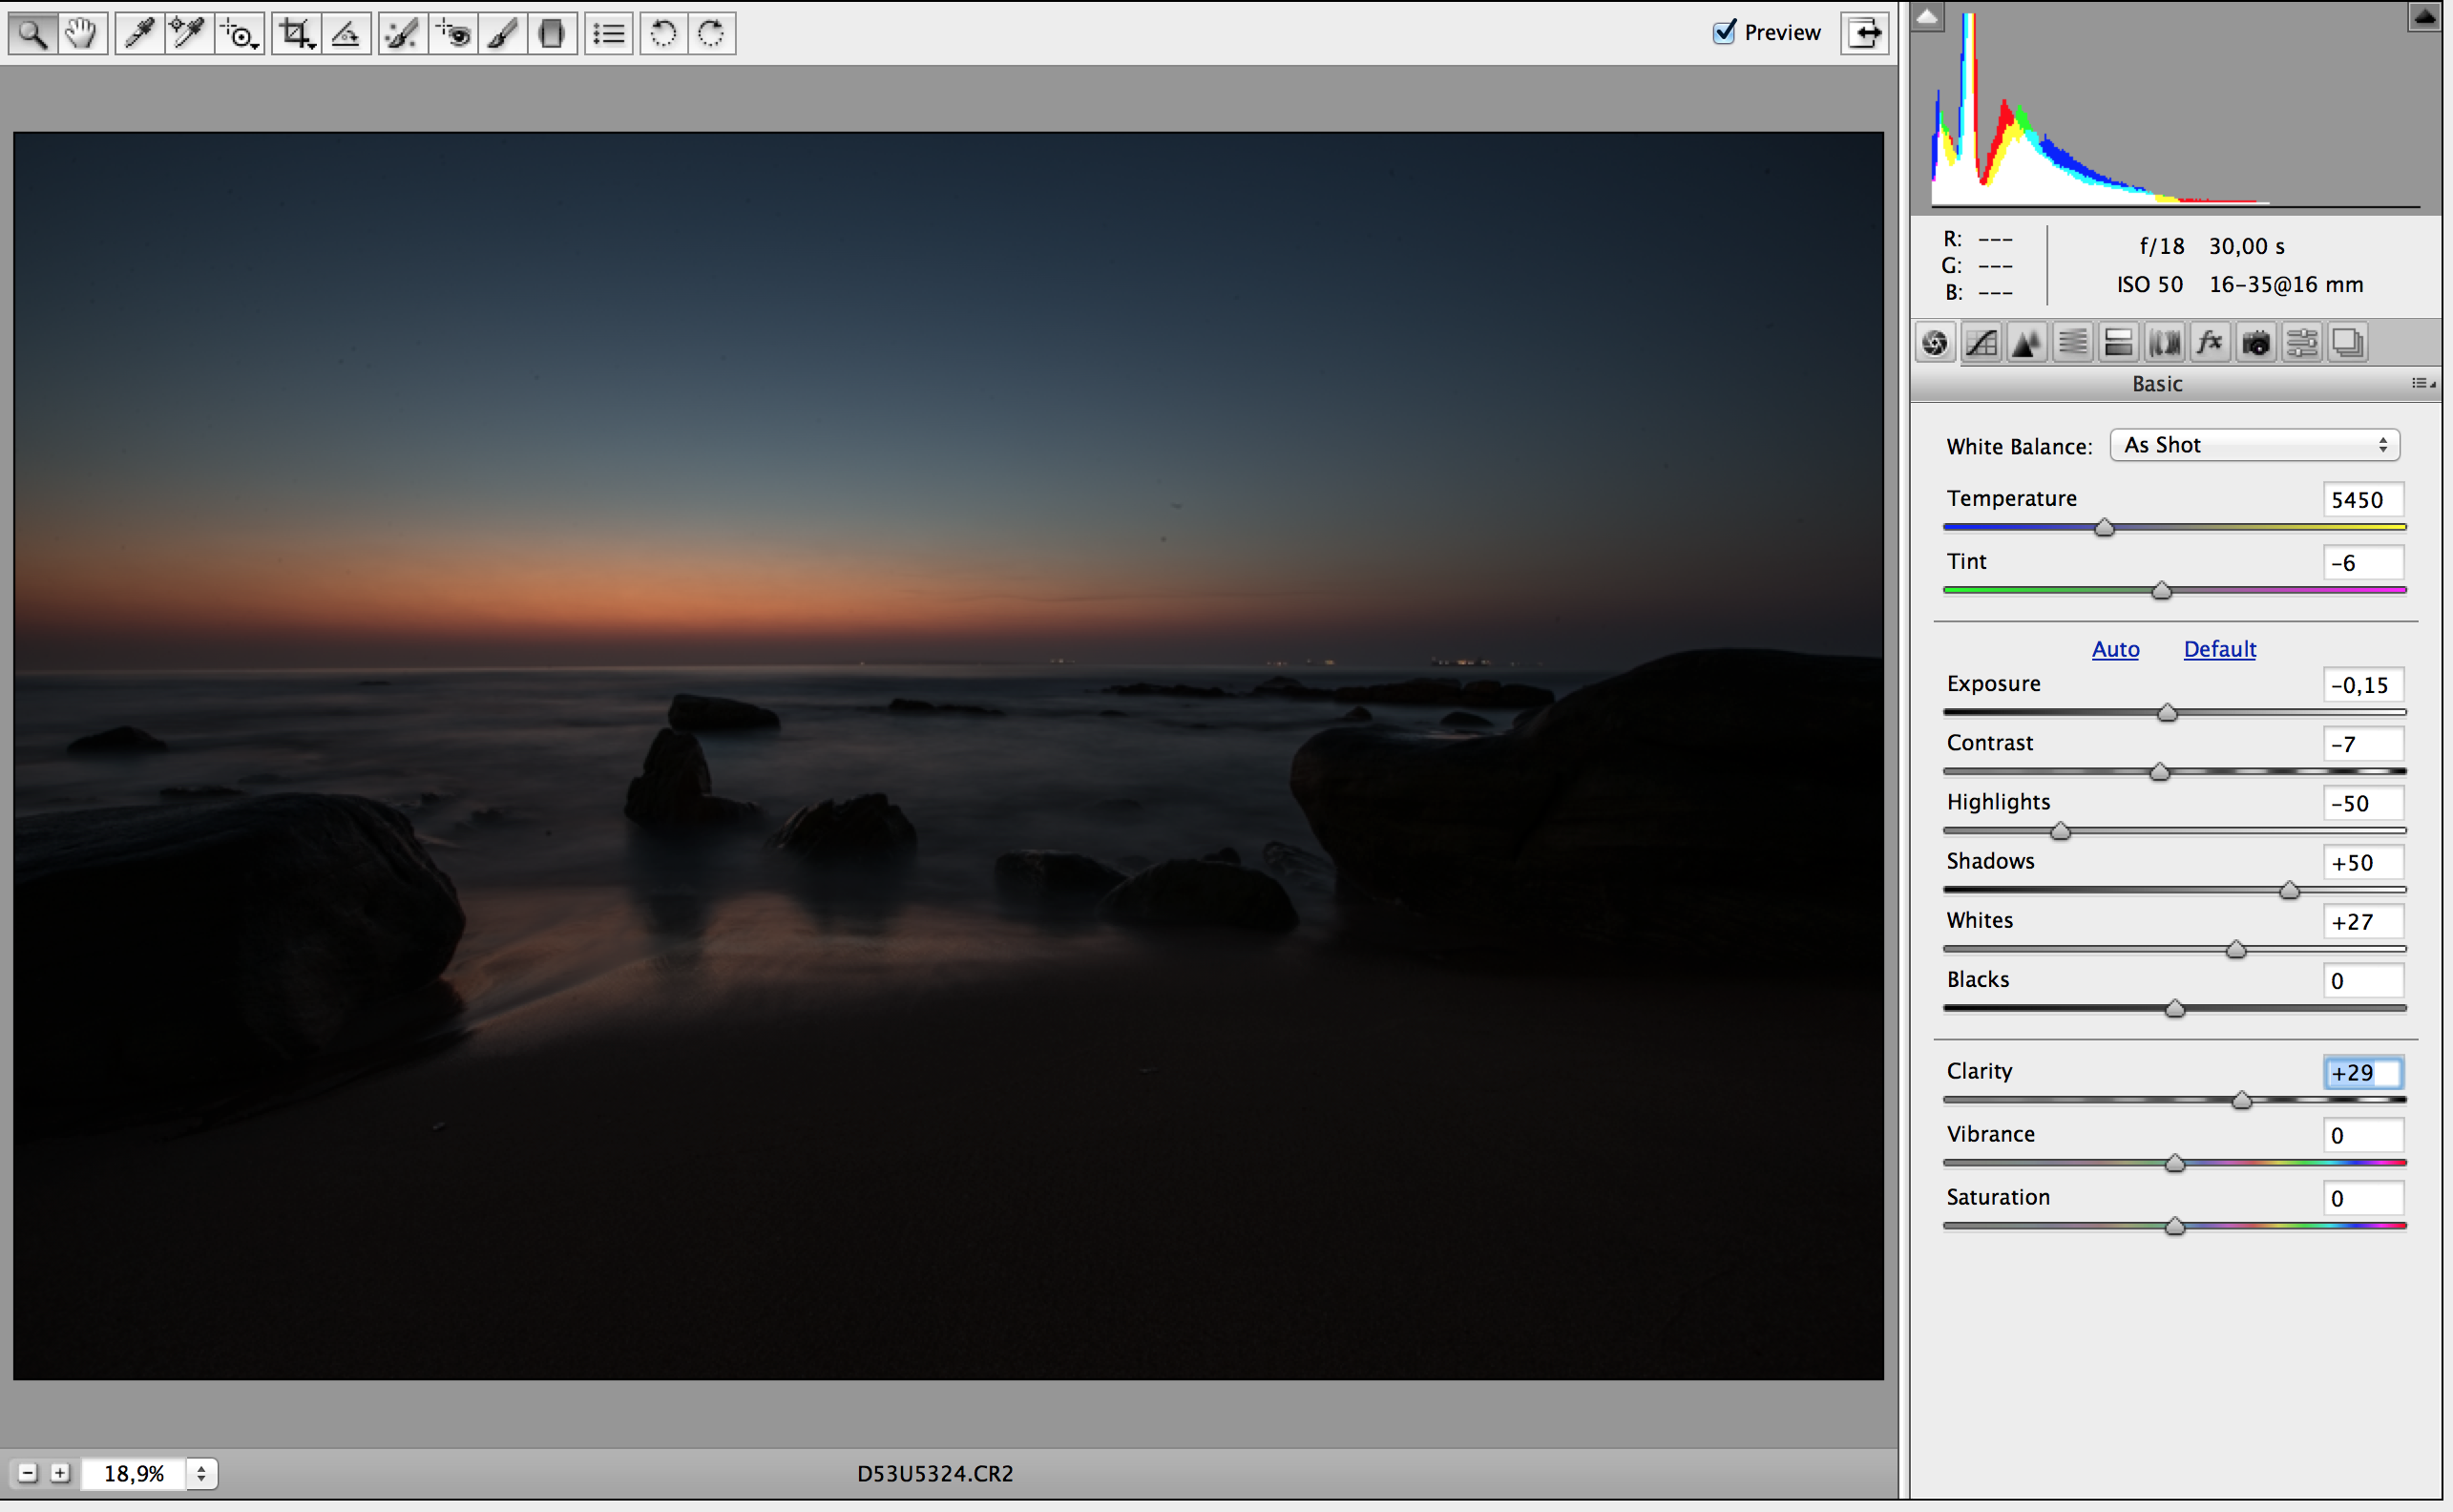
So when I am shooting a landscape of extremes I bracket twice: once for the foreground and once for the sky. Then I blend them. The exposure is based on a neutral area and then treating the mids and lows histogram as one and the highs histogram as another. So my two exposures would look like this on the histogram:
If you have not bracketed then you can easily recover two pictures from a RAW file like this and blend them.
This is the original RAW file:
and this is my sky exposure:
and my foreground exposure:
Notice how I ignored the blowouts on the sky and pushed the exposure and shadows up, and increased the blacks a bit.
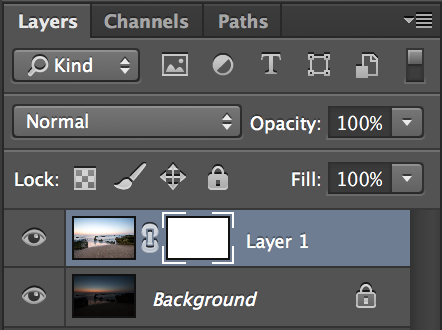
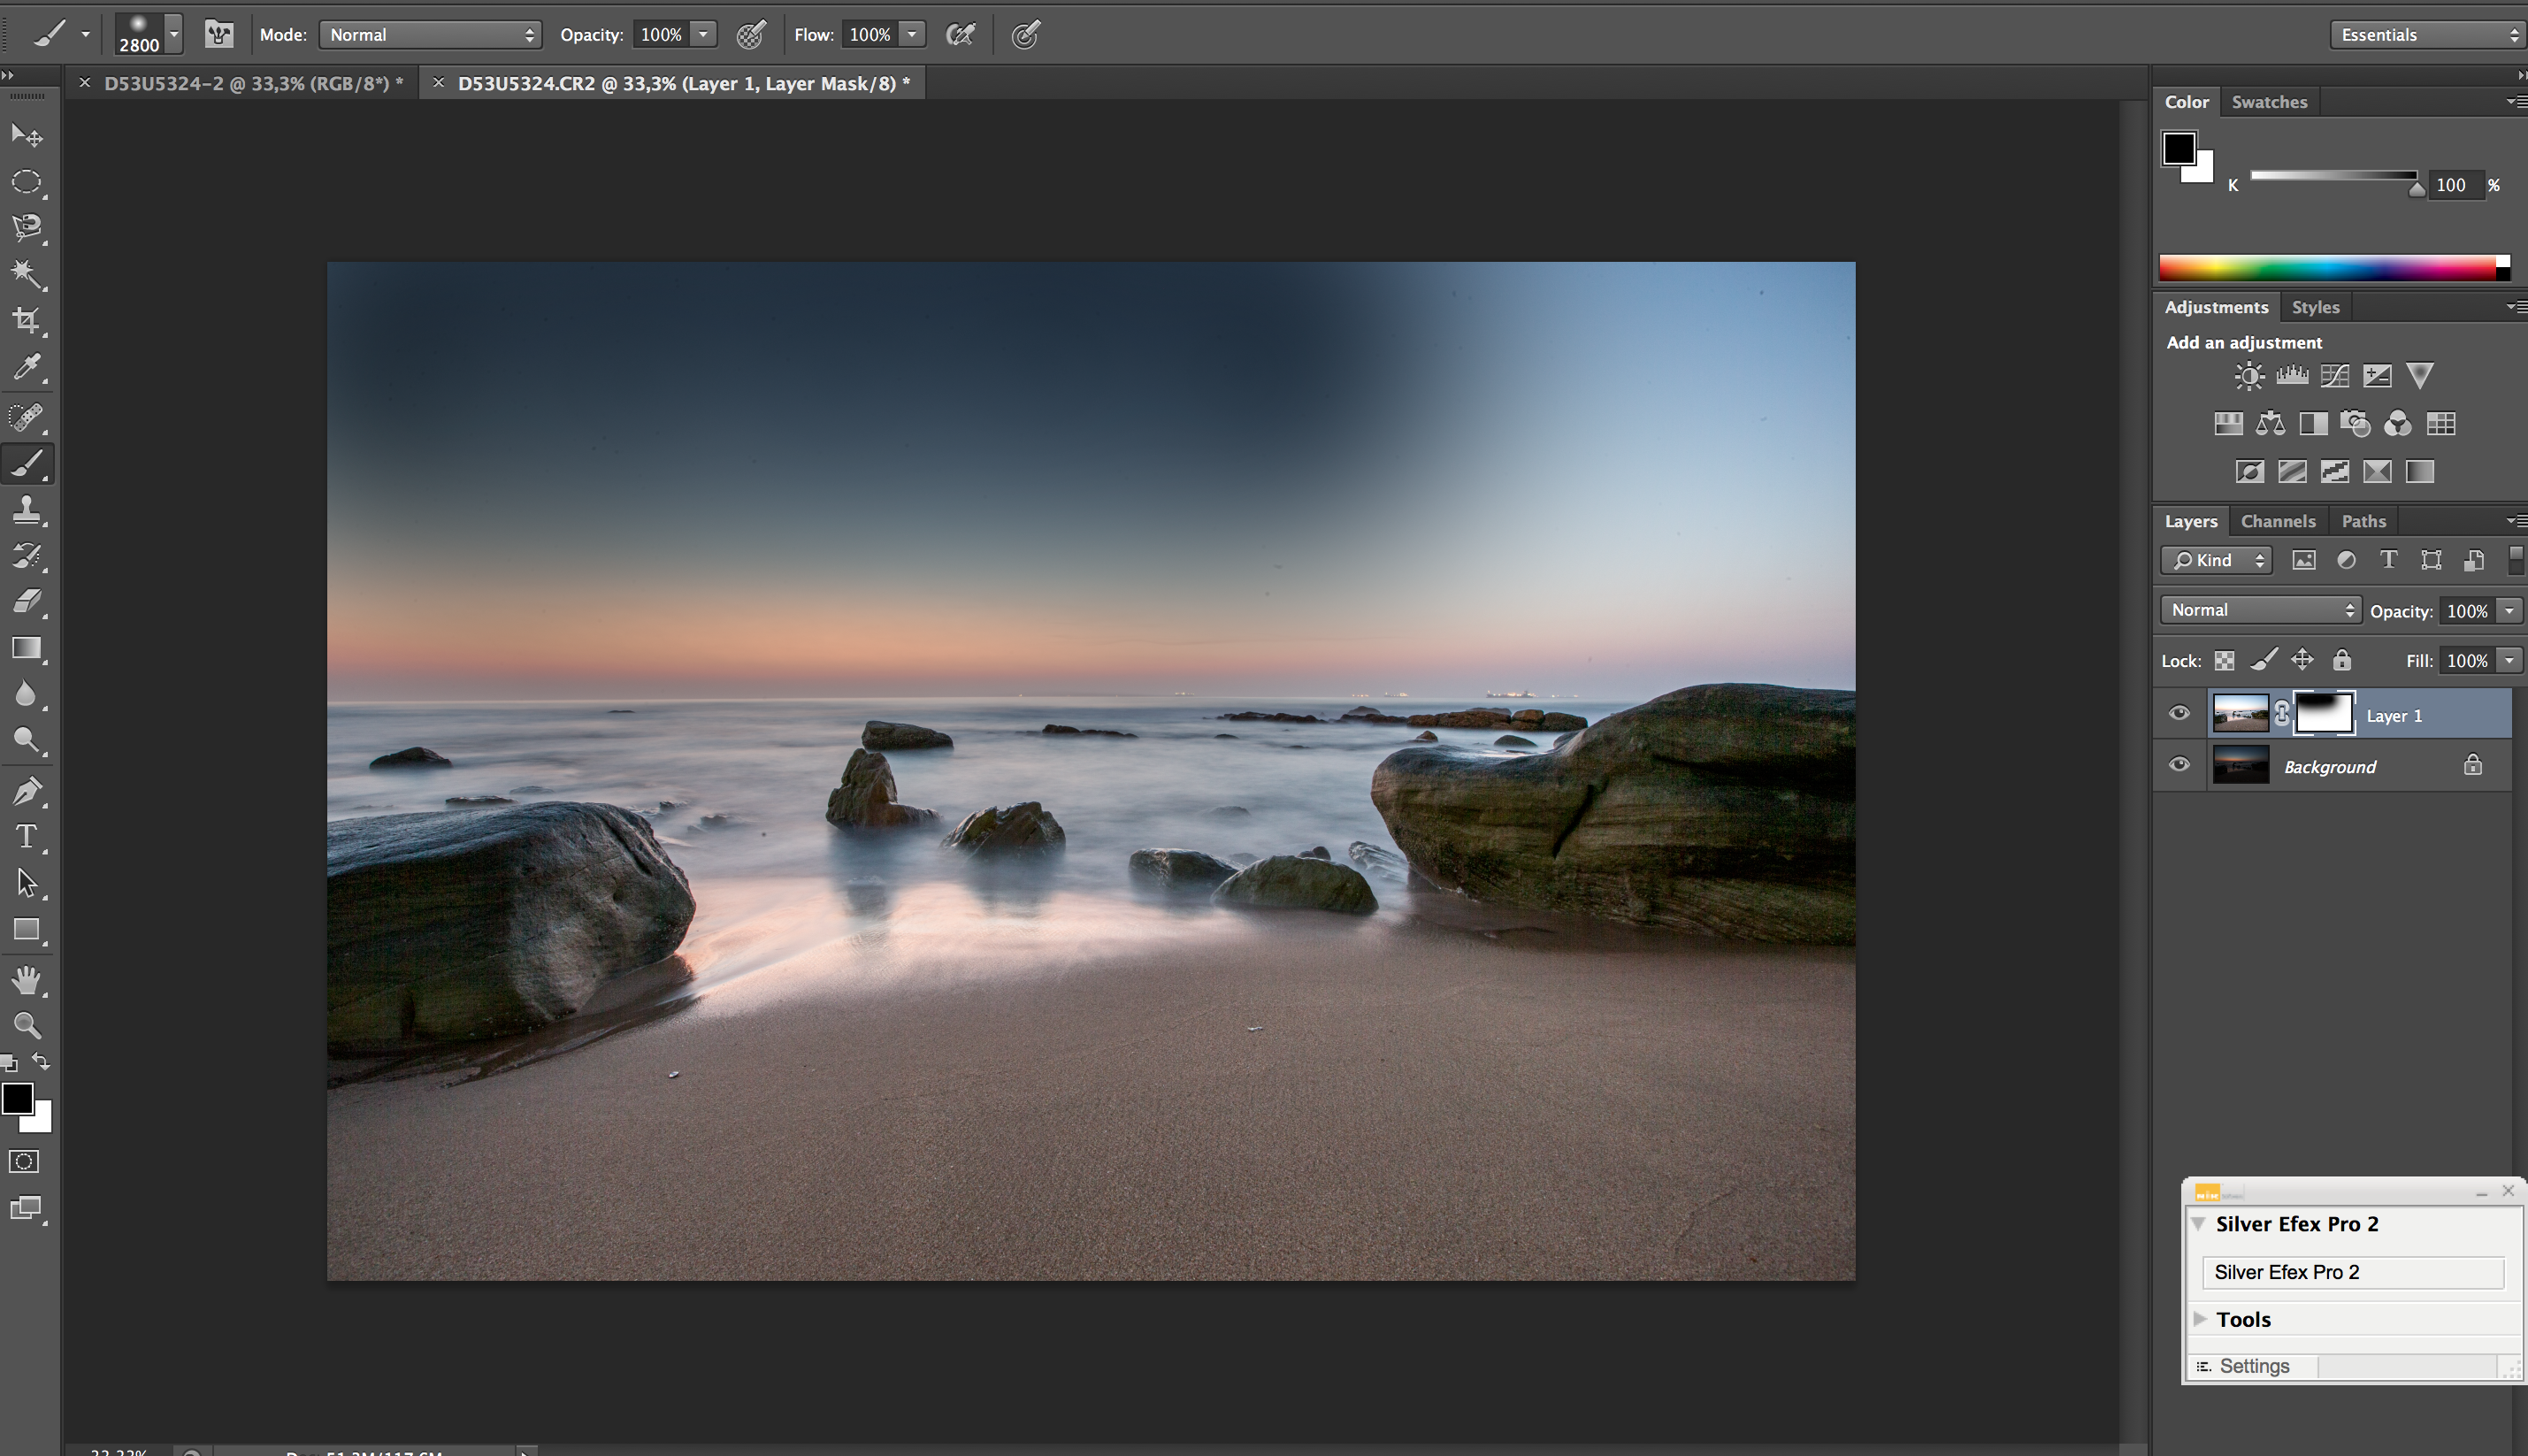
Then I open both of these in Photoshop and I copy one and paste it on the other. The shortcut is cmd A cmd C the cmd V to paste. It will look like this in Photoshop:
Notice the foreground exposure is Layer1 – add a layer mask to this. Sky exposure is the Background.
This shows the Layer mask on Layer1:
Then take a black brush Opacity set at 100% and paint over the sky:
In this case I have painted from left to right and still have to paint the right upper quarter.
Once completed I do levels again and sharpen as normal.
I remember working for my father when I was still at school. My jobs were always to file in his office.
“It’s easy to file. The hard part is to find something after you’ve filed it” he would say. That was way before computers. Now we all drop files into our hard drives and hope we can find them again.
At the outset, the best thing is to tag your pictures using keywords on the metadata. Then it’s easy to find the pictures you want. But if you do not tag consistently then you must file properly. I have been using digital cameras since 2000. The quality was shocking but I still have those pictures. I have also subsequently scanned all my photographs and slides into separate folders.
One of the best tips I received was to make a folder on my computer and call it MY DIGITAL PHOTOS.
My Digital Photos
Computers tend to save all pictures you save from emails and the web into My Pictures. So if you create MY DIGITAL PHOTOS it is just that. Then I have a folder for each year:
All my photos, year by year
I always transfer my pictures from the camera card to the computer by manually selecting the pictures ( Ctrl A) and copying (Ctrl C) before pasting (Ctrl V) into a folder. I then back the folder up on an external drive before formatting the card in the camera.
So now it’s 2013 and I have high quality large size files and I work like this. For every shoot I do I label the folder with the date first in to format ccyymmdd followed by AM or PM if I am shooting all day followed by the camera I use followed by Keywords for the shoot. So it looks like this:
Labelling by date, AM or PM and camera with key words
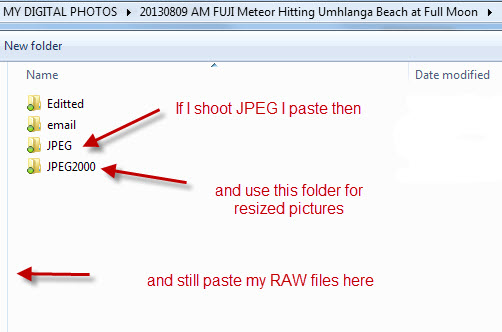
Before I used to create the folders new each time; now I prepare proforma folders the way I like them. I set up each folder with the following subfolders: Editted, JPEG and email. I then make copies of these proformas (or blanks) and rename them when needed. I sue “Editted” to save Photoshop files of the pictures I am working on, JPEG for 2000×2000 pixel pictures for screen showing and email for 900×900 pixel pictures to email and post on the web. More about how I resize later. I shoot RAW only except for things like weddings and parties, and then I leave the RAW files in the main folder and put the JPEGs into the “JPEG” Folder. Sometimes I create another subfolder JPEG2000 for the screen showing versions.
When I do a shoot I just rename the folder and paste the RAW files into it. So MY DIGITAL PHOTOS looks like this:
Blank proformas
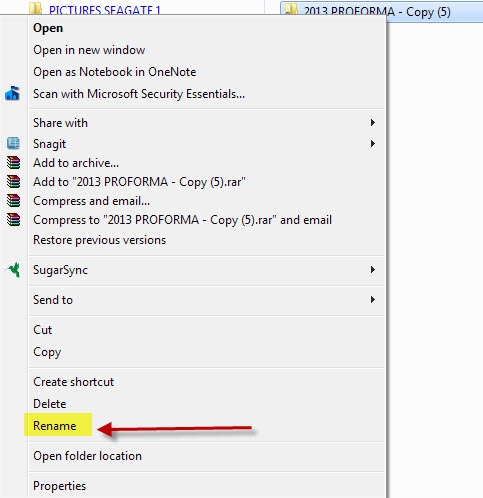
To rename I right click on one of the proformas (I choose the highest number and work back) and rename it:
Renaming a proforma folder
So it looks like this:
The renamed folder highlighted
So I open that file and paste the RAW files into the folder. If you Just shoot JPEG then file them here too. If you shoot JPEG and RAW then drop them all here, or separate the JPEGS into the JPEG folder. The RAW files remain adjusted but unchanged, i.e. you can open them and return the settings to as shot without losing any data. If you open a JPEG and save it then the file degrades. After about 12 openings you will see loss of integrity.
Copying RAW or JPEGS to this folderSaving edited and resized pictures
Once I work on a RAW file I save the Photoshop Document (PSD) to the edited folder. From there it is easy to resize in batches and save to the relevant folder.
When I do a big trip with morning and afternoon shoots I put them all in a folder with the start date of that trip, as there can be 15 to 20 subfolders in these. So it will look like this:
One folder with many shoots on a trip
And when you open it, it looks like this:
A portfolio folder for the shoot
When I am on a big trip I then copy the edited files from each morning or days shoot onto a newly created Portfolio file and then resize in that folder, so my Portfolio for the above looks like this:
Inside the portfolio file: edited, JPEG and email sizes
It is useful to create an evaluation folder for each day when on workshops and I use it similarly to the portfolio folder:
For each year I also like some special folders such as for all the Best Edited, Competitions and any monthly meetings.
Other categories for annual folders
Once I have created a folder I back it up onto an external drive. Once it is backed up onto a second external drive I delete the folder from my computer, as I have a tiny hard drive on my MacBook and huge photo files. I use a program called Goodsync to synchronise changes in folders if I edit any pictures after the backup has been made.
Remember to do what you do consistently and back up. That way you will find the pictures you want forever.